![]()
The Julia programming language is open source (and hence free) scientific computing software. You can think of it as a modern kind of MATLAB.
Jupyter notebooks (named for the languages Julia, Python and R) are a convenient way to collect and present a computation. You can intersperse your code and output with rich Markdown comments.
I’ve written a tutorial notebook with common Julia operations to help you get up to speed, and I’ll add onto it as we learn more things over the semester.
You can view (but not edit) notebooks, even without installing software, using the nbviewer website. Just copy the URL of the notebook you are interested in and paste it into their form. For example, here’s our tutorial at nbviewer.
You’ll want to be able to write Julia code and edit notebooks on your own computer, and to do this you’ll need to install some software.
Julia Installation
-
JupyterLab Desktop is a convenient application for viewing and authoring Jupyter notebooks. Follow the installation instructions to put a copy on your computer.
-
Install Julia from an official binary. Advanced users may prefer to use a command line installer instead. Take your pick.
-
Before you can start using Julia with the friendly Jupyter notebook interface, you need to run a short command in Julia itself to activate its Jupyter capabilities. Launch the Julia application, which will start a command line interface like this:
               _
   _       _ _(_)_     |  Documentation: https://docs.julialang.org
  (_)     | (_) (_)    |
   _ _   _| |_  __ _   |  Type "?" for help, "]?" for Pkg help.
  | | | | | | |/ _` |  |
  | | |_| | | | (_| |  |  Version 1.9.4 (2023-11-14)
 _/ |\__'_|_|_|\__'_|  |  Official https://julialang.org/ release
|__/                   |

julia>
At the command line, enter the following single line.
import Pkg; Pkg.add("IJulia")Julia will then download, compile, and install the packages needed to interface with Jupyter notebooks. This can take a bit of time; go get a coffee.
-
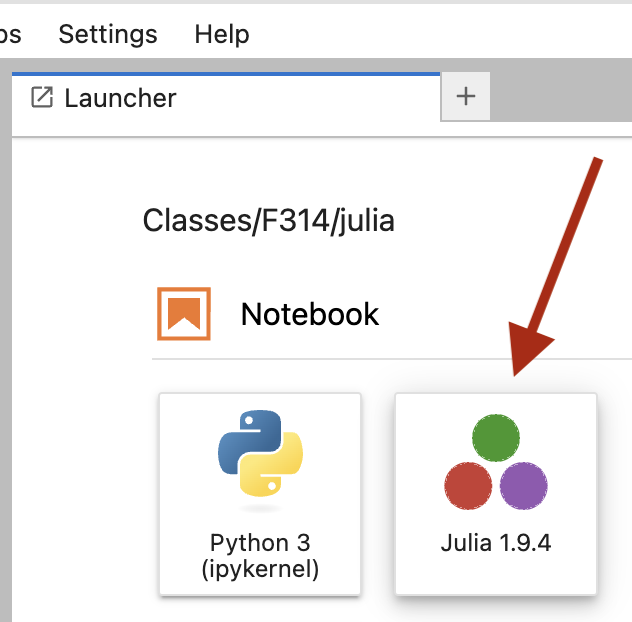
You can now launch the JupyterLab Desktop application and create a new notebook using the Julia kernel.
What if something goes wrong? 🧐
Julia installation seems to be pretty reliable. But JupyterLab Desktop may still have some kinks to be worked out, especially on Windows.
When launching a JupyterLab session for the first time, you might see an error such as:
⚠️ Python environment not found Install with the bundled installer or Change the default Python environment.
If this happens, click on Install with the bundled installer. Once this is done, restart JupyterLab. 🤞
In a pinch, if you are unable to install JupyterLab Desktop, you can still use Jupyter notebooks the old school way, it will just be a little clunkier. To do so:
-
Launch command line Julia as you did when installing
IJulia. -
At the prompt, type
using IJulia; jupyterlab()
The first time you do this, you will be prompted whether Julia should install
Jupyter. Enter y and press Return to proceed with this installation.
When the installation is done, Julia will open a web browser tab and you’ll see JupyterLab running in your web browser. 🤞🤞
Package Installation
The course text uses a few common Julia packages, and you’ll need to install these right away. If you have JupyterLab up and running successfully, you
can copy/paste the following lines into a notebook cell. Then hit Shift-Return
to execute the commands in the cell.
import Pkg
Pkg.add("LinearAlgebra")
Pkg.add("SparseArrays")
Pkg.add("Plots")
Pkg.add(url="https://github.com/VMLS-book/VMLS.jl")
Alternatively, you can enter these instructions in the
same command line interface you used to install IJulia.
The first three packages (LinearAlgebra, SparseArrays and Plots) are standard Julia packages and the fourth is a special on written by the book’s authors: VMLS stands for Vectors, Matrices, and Least Squares in the text’s subtitle.
Resources
- Julia documentation
- Course textbook Julia companion
- Third party Jupyter notebook companions for every chapter of the text.